Click Here to enter the Buzz Blast $10 cash giveaway, ends 01/22
Click Here to enter our Mocha Rose Creations and Girly & Curly Giveaway, Ends 01/21
Monday, January 31, 2011
Hair Care Review
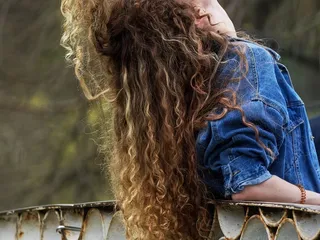
I was recently given a bottle of Hair Milk by Carol's Daughter and I must say I love it! I have naturally curly hair and I have been searching for a product that will define my curls and not leave them feeling crunchy or greasy and this product is the best I have found so far. It makes my curls soft, touchable and most importantly non greasy while defining the curls and making them look full of life :)
Enjoy!
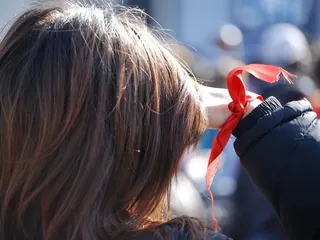
Here is the top of my ponytail, not the greatest pic but you can see the curls
Red Sparkly Hair Clips
I came up with this idea because the diva didn't have any red hair accessories so I took about 4 inches of red ribbon, sealed the ends and then hot glued it over an alligator clip and then hot glued on 4 sparkly jewels I already had in my scrap booking stuff. I think they came out pretty cool. What do you think?
Enjoy!
Please ignore the reflection of my bathroom lights :)
Sunday, January 30, 2011
Time for a Trim
Well as I was pressing out the diva's hair I noticed the ends were looking a little damaged, so I said it's time for a trim, I cut about an inch and a half off. The diva said she felt like she was in the beauty salon :)
Enjoy!
4,3,2,1
I started off the hair with making four ponytails on the top, then on the second row I made three ponytails, then for the third row I made two ponytails, then for the last row I made one ponytail, hence the name of the style, 4,3,2,1, :) I then connected the ponytails to each other and left three braids out.
Enjoy!
The diva wanted to pose :)
Tuesday, January 25, 2011
Cornrows
I finally learned how to do cornrows yay! I have been trying on the diva for months now and I finally got it. What do you think?
Sunday, January 23, 2011
Curly Bows
I have always wanted to make these and so I googled for a tutorial and found one! I think they came out pretty good, next time I will add more ribbon for a fuller bow, but not so bad for my first try.
I took two dowels and sprayed them with water from a bottle, then wrapped my ribbon around each one and then secured the ends with sprayed down clothes pin (spray with water so they don't burn in the oven) I put them in the oven on a baking sheet lined with foil at 250 degrees for 25 min. I let them completely cool and then removed the ribbon from the dowels and cut them 4 times, then burn the ends to secure and then tied together with thread and hot glued on a clip.
Enjoy!
Crocheted Hair Bows
I crocheted these two hair bows using two different yarns, I used Red Heart in Zebra and Caron Simply Soft in White and then added the little beads for the extra touch, they match a pair of leg warmers I made for the diva.
Enjoy!
Hair Clip Board
My diva's hair accessory collection was growing and I needed to find a more organized way to store them, so while browsing the net I came across this great idea.
Items Used:
MDF ($3.32 Home Depot)
Fabric (Free I cut up a pillow case I had)
Batting ($4.97 Wal Mart)
Ribbon (Some I had, the others I bought at Wal Mart for $0.47 and for $1.97)
Hot Glue (Free I keep a ton on stock)
Source: http://www.sisterstuff.blogspot.com/
Enjoy!
Something is missing.....
Ah-ha! There it is!
Silver Bow
I love how this little bow came out, I followed the tutorial over at http://www.theribbonretreat.com/ and then came up with the actual bow on my own.
Enjoy!
Monday, January 17, 2011
Ribbons!
For this style I sectioned the hair down the middle and then made 4 ponytails on each side that connected together and secured with black rubber bands. I then weaved a piece of pink ribbon through each side and made bows at the end.
Enjoy!
Sunday, January 16, 2011
Homemade Hair Bows Galore!!
I recently took up making my own hair accessories, they are really simple to make and look so cute.
These are not my own original design I found a pattern online.
Enjoy!
Saturday, January 15, 2011
Pretty Curl Style
This style is by far my favorite so far, I made a round part all the way around the head and gather all the hair in the middle into one big ponytail, then the remaining hair left out I parted into separate ponytails and split the hair in half and twisted it to connect with the hair from the other ponytails. Then connected all ponytails to the big ponytail and curled and pinned the ponytail and then added a white bow in the back.
I got this idea from http://www.princesshairstyles.com/
Enjoy!
Style of Day
I don't really know what to call this style so I call it the style of the day :) I sectioned off the top half of the hair and then made six separate ponytails and then connected the hair from each ponytail and twisted them together and then connected the ponytails to one big ponytail in the back.
Enjoy!
Chain Braids
For this style I sectioned off the top half of the hair and started from right to left making parts going back to the middle of the head and then made individual ponytails that connected to each with with black rubber bands. I made each ponytail tight enough to hold but not too tight that would pull the hair. This style last about a week.
Enjoy!
Two Cornrows into a ponytail
I sectioned off the front half of the hair and then did two cornrows going in opposite directions (I am not particularly good at doing cornrows but I am learning). I then connected each cornrow to the ponytail, to achieve the wavy/curls in the ponytail I braided about 6 individual braids and let the diva sleep overnight with them, then unbraided them in the morning and added a cute pink flower hair accessory.